Moving around a Microsoft Excel workbook isn’t difficult if you have only a few sheets. That’s because Excel displays sheet tabs at the bottom of the screen. Simply click a tab to activate that sheet. The more sheets you add, the greater the chance that Excel will push some sheet tabs out of sight.
When that happens, you don’t need fewer sheets, you need more ways to access sheets. In this tutorial, I’ll show you several ways to quickly move from sheet to sheet in an Excel workbook.
I’m using Microsoft 365 on a Windows 10 64-bit system, but you can use older versions of Excel and Excel for the web.
SEE: Windows, Linux, and Mac commands everyone needs to know (free PDF) (TechRepublic)
How to use shortcuts to move in Excel
The default number of sheets in an Excel workbook is three, but there’s no limit to the number of sheets a workbook can have. Your system’s memory might limit the number of sheets, but Excel won’t. With no limit, moving around a busy workbook can quickly become tedious. Fortunately, Excel offers shortcuts.
Moving between the first few sheets is easy. Simply click a tab at the bottom of the screen (Figure A). There’s one big inherent problem with this method: You can’t click tabs you can’t see. Moving to another sheet is no longer a quick click, but it still isn’t difficult.
Figure A

To the left, you can click the back and forward arrows (circled in Figure A). For each click, Excel moves the tabs one sheet to the left or right, exposing tabs you might not otherwise see. If your workbook has dozens of sheets, this method isn’t particularly helpful because it could take several clicks to reach the sheet you want.
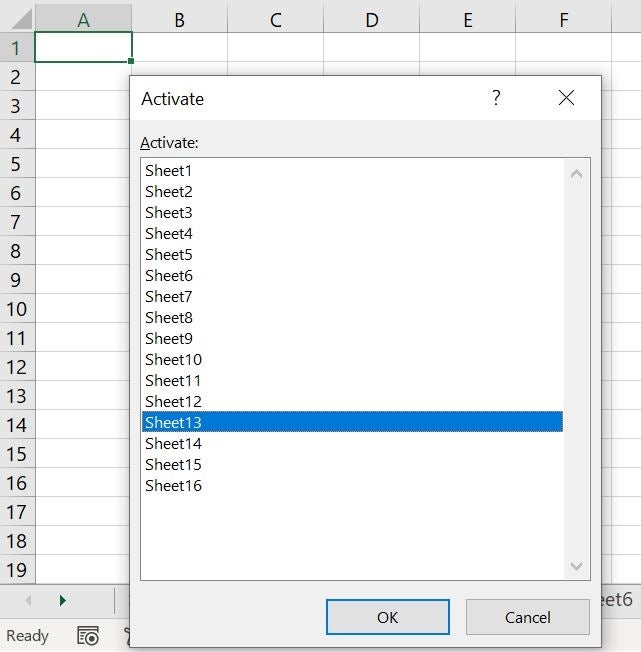
Using the sheet list is a quicker method. To do so, right-click the back and forward arrow area to display a list of sheets (Figure B). Click a sheet to activate it immediately. If the dialog can’t display the complete list, Excel will add a scroll bar to the right. Even if you must scroll through dozens of sheets, it’s still quick.
Figure B

The sheet list might become your best friend if you must move around numerous sheets in the same Excel workbook. There are shortcuts you might also find useful:
- Move to the first sheet: Press and hold Ctrl and click the left arrow.
- Move to the last sheet: Press and hold Ctrl and click the right arrow.
- Move one sheet to the right: Ctrl + PgDn. Continue to hold down Ctrl and press PgDn to continue moving to the right.
- Move one sheet to the left: Ctrl + PgUp. Continue to hold down Ctrl and Pres PgUp to continue moving to the left.
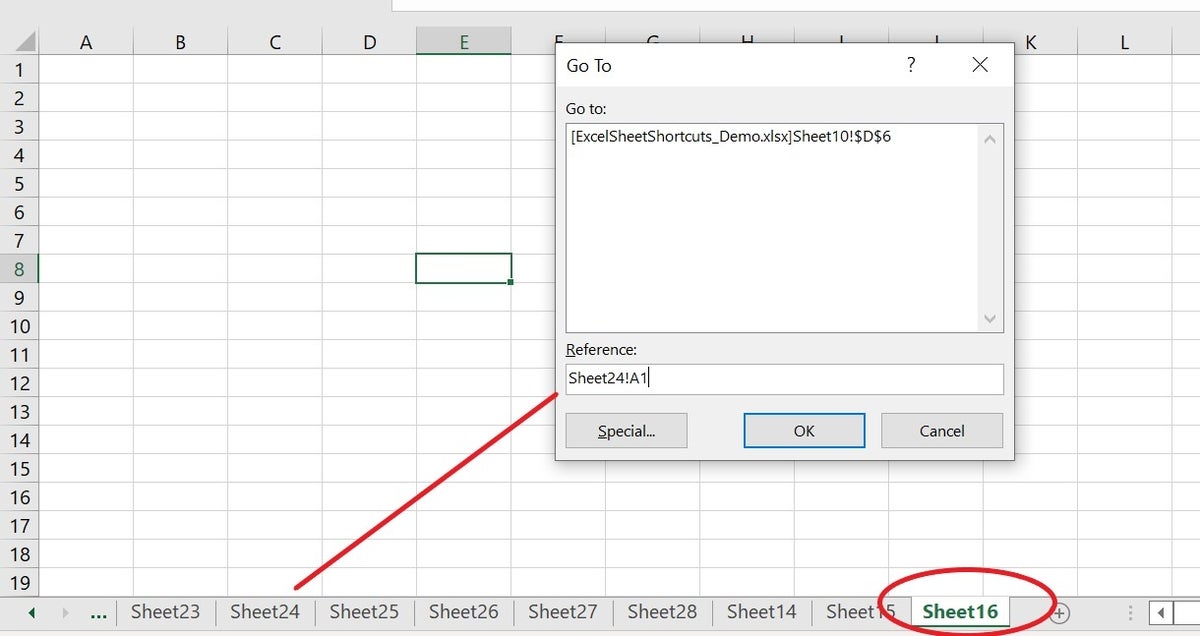
- Move to a specific sheet: Press F5 to open the Go To dialog. The Reference setting will display the active sheet and cell. Overwrite it (Figure C), and click Go. The required exclamation mark is a separator between the sheet and cell reference. The only advantage to this method is that it also activates a specific cell.
Figure C

How to use hyperlinks to move in Excel
Hyperlinks are a type of shortcut that requires only a quick click. If you find moving around using tabs and keyboard shortcuts a bit tedious, you might try hyperlinks. A hyperlink is specially formatted content that responds to a click by opening a file, a web page or moving the cursor to another location in the same file.
To demonstrate, add hyperlinks to a sheet one at a time. First, click the Insert tab, and click the Link dropdown in the Links group. From the dropdown, choose Insert Links at the bottom of the list.
In the resulting dialog, click Place in This Document in the Links bar (to the far left). In the Or Select a Place in This Document list, click the sheet to which you want to link (Figure D).
Figure D

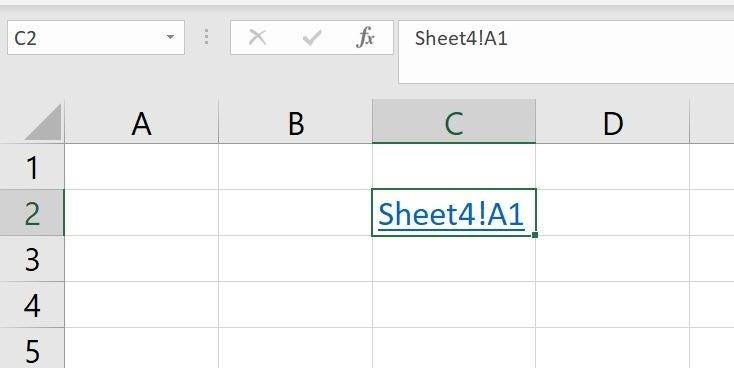
Click OK to return to the hyperlink shown in Figure E. Simply click the hyperlink to immediately activate Sheet4.
Figure E

Stay tuned
Chances are you will want a full list of sheet hyperlinks. In a future article, I’ll show you how to create a quick list of hyperlinked sheet names using Microsoft Power Query.
Master Microsoft Excel with these courses from TechRepublic Academy:


