Your company most likely depends on data in several ways. Without that data, running a successful business would be challenging. That data is probably housed in databases, and you want them to perform at peak efficiency. One way to monitor your databases for performance is with the help of the Percona database performance monitoring tool.
SEE: 40+ open source and Linux terms you need to know (TechRepublic Premium)
Percona can be used with MySQL and MariaDB via the InnoDB, XtraDB, and/or MyRocks storage engines. With Percona, you can run checks for common database security issues and run query analytics and metrics monitors.
I want to walk you through the process of deploying Percona as a Docker container.
What you’ll need to deploy Percona
Outside of the Docker installation process, the deployment of Percona is the same, regardless of the operating system. So, to pull this deployment off, you’ll need an OS with Docker installed.
I’m demonstrating with Ubuntu Server 22.04, so if you’re using a different operating system, you’ll need to alter the installation steps. You’ll also need a user system resource with sudo privileges.
That’s it. Let’s deploy.
How to install Docker
The first thing we’ll do is install Docker. Log in to your hosting Ubuntu server, and add the necessary GPG key with:
curl -fsSL https://download.docker.com/linux/ubuntu/gpg | sudo gpg --dearmor -o /usr/share/keyrings/docker-archive-keyring.gpg
Add the official Docker repository with the command:
echo "deb [arch=amd64 signed-by=/usr/share/keyrings/docker-archive-keyring.gpg] https://download.docker.com/linux/ubuntu $(lsb_release -cs) stable" | sudo tee /etc/apt/sources.list.d/docker.list > /dev/null
Install the necessary dependencies with:
sudo apt-get install apt-transport-https ca-certificates curl gnupg lsb-release -y
Install the latest version of the Docker engine with the commands:
sudo apt-get update
sudo apt-get install docker-ce docker-ce-cli containerd.io -y
Start and enable the Docker services with:
sudo systemctl enable --now docker
Finally, add yourself to the docker group with:
sudo usermod -aG docker $USER
Log out of the server and log back in so the changes take effect.
How to deploy the Percona server
First, we’ll create a volume for persistent storage with the command:
docker create -v /srv --name pmm-data percona/pmm-server:latest /bin/true
The above command will take a few minutes to complete. When it finishes, deploy Percona with:
docker run -d -p 8000:80 -p 8443:443 --volumes-from pmm-data --name pmm-server --restart always percona/pmm-server:latest
Verify the deployment with:
docker ps -a
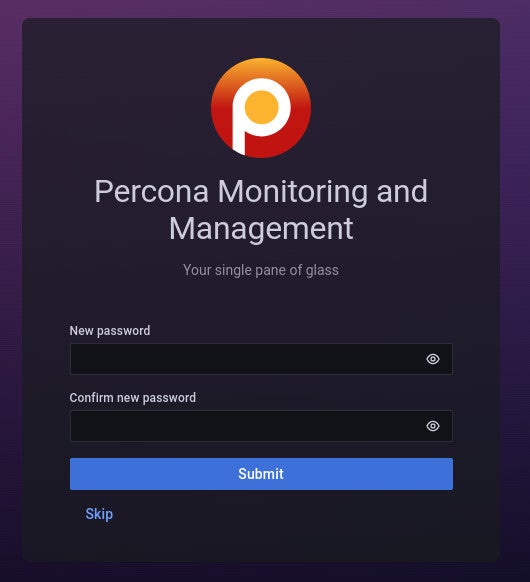
You should see two listings for percona/pmm-server. After a moment, you should be able to point a browser to https://SERVER:8443, where SERVER is the IP address of the hosting server. The default credentials are admin/admin, and you’ll be prompted to change the admin password on first login (Figure A).
Figure A

Your monitor is now ready
The last thing you must do is install the Percona client on your MySQL or MariaDB server. You can download the latest package repository for Ubuntu-based distributions like so:
wget https://repo.percona.com/apt/percona-release_latest.$(lsb_release -sc)_all.deb
Install the repository with:
sudo dpkg -i percona*.deb -y
Finally, install the client with:
sudo apt-get update
sudo apt-get install pmm2-client -y
Connect the client to the server with:
sudo pmm-admin config --server-insecure-tls --server-url=https://admin:PASSWORD@SERVER:8443
Where PASSWORD is the new password you set for the admin user, and SERVER is the IP address of your client host.
Configure the Percona client
Next, we must configure the client to monitor the database. Log into the database console with:
sudo mysql -u root -p
Create a user named pmm with:
CREATE USER 'pmm'@'localhost' IDENTIFIED BY 'PASSWORD' WITH MAX_USER_CONNECTIONS 10;
Where PASSWORD is a unique and strong password.
Grant the necessary permissions with:
GRANT SELECT, PROCESS, SUPER, REPLICATION CLIENT, RELOAD ON *.* TO 'pmm'@'localhost';
Flush the privileges table and exit the console with:
FLUSH PRIVILEGES;
exit
Add the MySQL or MariaDB service to Percona with:
sudo pmm-admin add mysql --username=pmm --password=PASSWORD --query-source=perfschema
Where PASSWORD is the password you created for the pmm database users.
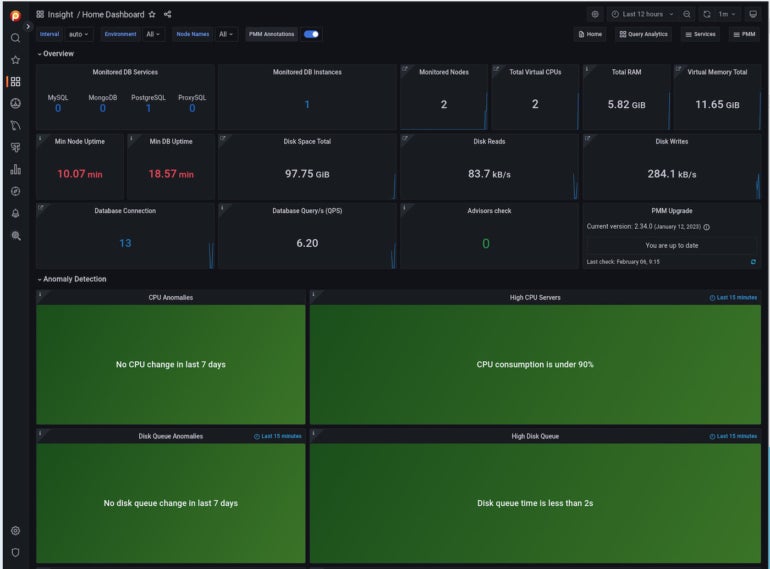
The new database will automatically appear in the Percona dashboard (Figure B).
Figure B

Keep a close watch on those databases
Given how dependent your businesses are on data, it’s crucial that you keep a close watch on the databases that house the information. Should your databases or the servers that house that data go awry, your whole business could come to a standstill. If you want to quickly deploy Percona, you can’t go wrong with Docker.
Subscribe to TechRepublic’s How To Make Tech Work on YouTube for all the latest tech advice for business pros from Jack Wallen.
If you are interested in learning more about Docker, check out the following resources in TechRepublic Academy:
Hacking and Securing Docker Containers
Linux and Docker Coding Bundle
Docker and Kubernetes mini-bundle


