How many times have you visited a URL at your desk and needed to quickly locate it on the go? How often have you opened a site in a Chrome tab on Android and needed it when you didn’t have your phone handy?
It happens. When it does, you want to be able to recall that site without having to bash your head against a cubicle wall until the link URL pops into memory space. We don’t want that; especially not when you only need to turn to a few settings options in Chrome to make this quite painless.
SEE: Windows, Linux, and Mac commands everyone needs to know (free PDF) (TechRepublic)
A word of warning: This is all or nothing. If you open up the syncing floodgates, you cannot instruct Chrome to not sync certain URLs or show only particular tabs that are open or have been recently closed. Once you enable the feature, it will display your history on both devices and reveal all recently closed tabs on both devices. I will also warn you that the syncing process can take some time. This will depend upon how much data you have to sync between devices.
You must be signed in to your Google account to make the sync process work. Once the sync is completed on one device, you can access all your synced records whenever you access Chrome on other devices using your Google account. I’ll be working with Chrome on the desktop via Elementary OS and Chrome for Android on a OnePlus 3.
Jump to:
- Setting up on the desktop
- Setting up on the mobile device
- Viewing history and recent tabs
- A great way to move from device to device
Setting up on the desktop
Setting this up on the desktop is the easy part. Launch your Chrome and click on the menu button — the three vertical dots in the upper-right corner. Click on Settings and then click Turn On Sync (Figure A). Enter your Google login details in the next window and click Yes, I’m In.
Figure A
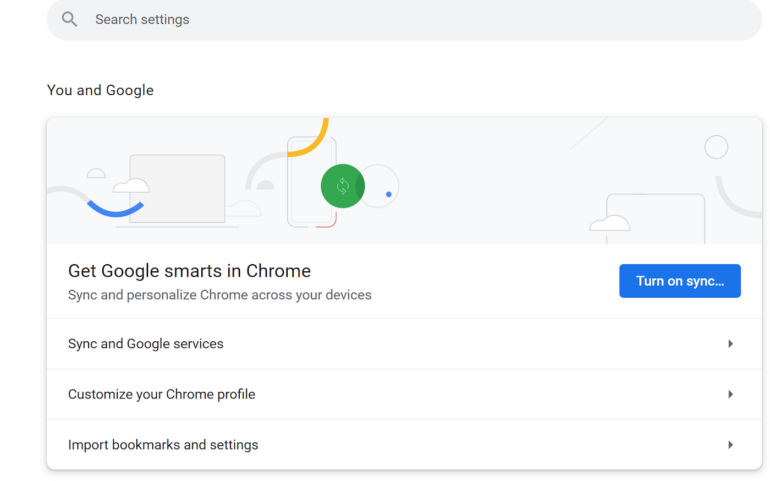
To customize your sync options in Chrome, click on the three vertical dots in the upper right corner, then on Settings and Sync And Google Services.
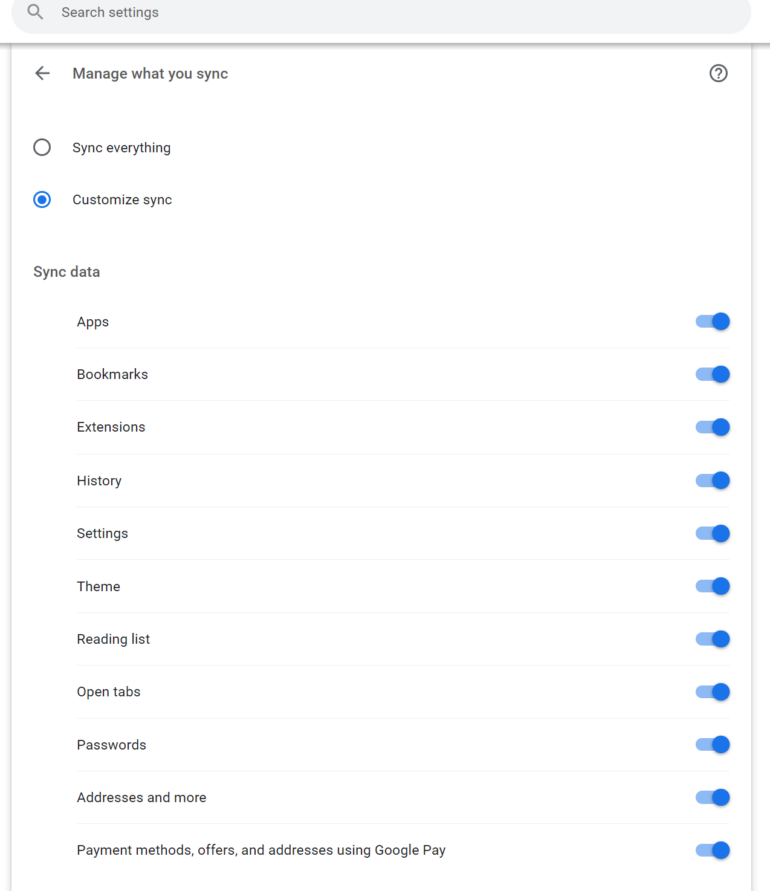
In the resulting window, click on Manage What You Sync. On this page, you can sync everything or click on the Customize Sync button to select which of the options you wish to sync across your devices (Figure B).
Figure B
Setting up on the mobile device
This is where it gets tricky, because the syncing options are slightly obfuscated. To set up syncing on the mobile device, do the following:
- Open Chrome.
- Tap the three vertical dots in the upper-right corner.
- Tap Settings.
- Tap your account name at the top of the resulting window.
- Tap Sync.
- Either tap Sync Everything or enable what you want to sync.
Viewing history and recent tabs
While your devices sync with one another, neither the history nor recently closed tabs will show up. In the meantime, you need to know where to go to locate this information.
On the desktop version of Chrome, click on the menu button and then History. In the resulting menu (Figure C), you will see a listing of all the recently closed tabs from your various devices as well as the currently open tabs. Should you see one you want to open, simply click it and the URL will open in a new tab.
Figure C

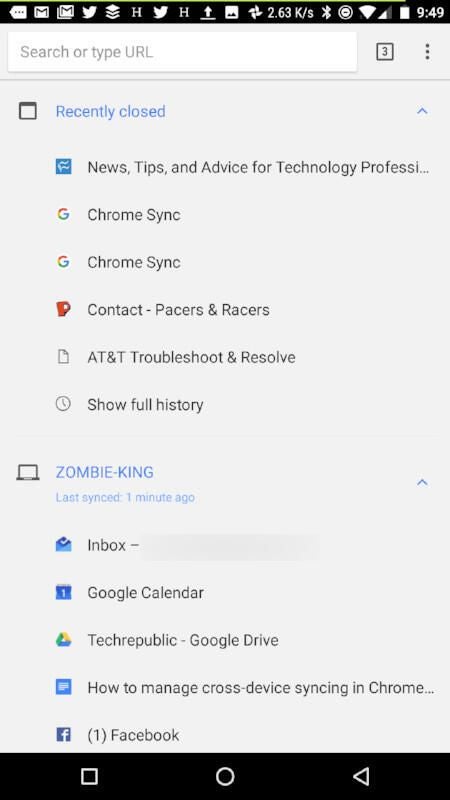
To view recent tabs on the mobile version of Chrome, do the following:
- Open Chrome.
- Tap the menu button.
- Tap Recent tabs.
In the resulting window (Figure D), you can view all the recent tabs from all of your devices.
Figure D
There you have it. Your Chrome history is now available to both the desktop and the mobile versions of Chrome. Just remember to have patience while your devices handle that first sync, as it can take some time to complete. While the sync is in progress, nothing will show.
A great way to move from device to device
If you’re constantly switching between desktop, laptop and mobile devices, and you’re a Chrome user, you owe it to yourself to enable the syncing of tabs and history. With these features working on your devices, you will have a much easier time finding those recently visited URLs, no matter which device you have in hand.
Discover more Chrome tutorials here: How to organize with tab groups, and how to set up and use different profiles.
